Although they are still quite expensive, Apple computers are becoming much more popular in Spain. But for people moving from Windows to Apple's operating system, there's a lot to learn (and configure). But nothing that is a seven-headed beast. Here are 10 recommended settings for your new Macbook, regardless of whether it's Pro or Air. Even if it's an iMac, there will be interesting settings for you.
10 Settings You Should Tweak on a New Macbook
When you get your new MacBook, it is recommended to adjust a few things. The setup process will take a little time, after which your machine will be ready to use more profitably.
1. Activate battery percentage
For those who have a Macbook, having control over the battery is essential. After all, you don't want to lose your work because the computer suddenly turned off due to lack of battery, do you?
To display the battery percentage, click the battery icon in the upper right corner. Then click on Show percentage. Now you will see the battery percentage on the screen.
2. Login to iCloud
If you didn't sign in to iCloud during the setup process, please do so as soon as possible. With iCloud, you can sync folders in iCloud Drive, reminders, contacts, photos, Safari information and more.
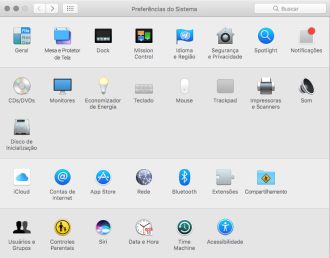
To log in to iCloud, open System Preferences > Click iCloud > Enter your Apple ID and password. You may need to verify your account using another Apple device, such as your iPhone or iPad.
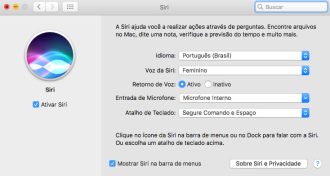
3. Enable or disable Siri
If you have or have had an iPhone, you know that Siri is a great virtual assistant, very useful at different times. And the good thing is, it's also on your Macbook. Siri should be on by default, but if you prefer to use Siri only on your iPhone, you can turn it off.
- To do this, go to System Preferences > Siri and uncheck the "Enable Hey Siri" box.
- However, if you plan to use Siri often, you can use this window to choose your voice, language, and keyboard shortcut.
4. Change the default browser
Apple's Safari is a great browser, but many users still prefer Google Chrome. One of the advantages of Google's browser is the management of bookmarks, which often help the user to organize themselves when there are several tabs open.
To set the default browser, go to System Preferences > General, and choose the Default web browser.

5. Change Trackpad Settings
The Macbook's Trackpad is very powerful, and there are a lot of options and settings. You can use your favorite settings based on your previous Mac usage.
Go to System Preferences > Trackpad and click Point & Click to adjust touch options, Scroll & Zoom to adjust scrolling behavior, and More Gestures to change those options as well.
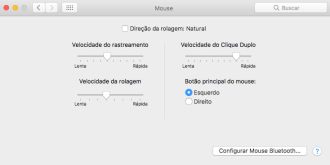
6. Set scroll direction
For those who are used to Windows computers, the first thing to be strange about a Macbook is the mouse scroll orientation, which is the opposite. If like me, you are confused by this orientation in reverse, know that it is very easy to change.
To make the mouse scroll vertically in the opposite direction, go to System Preferences > Trackpad and click the Scroll & Zoom tab. Then uncheck the Scroll direction: Natural box.
7. Adding and Removing Items from the Dock
Apple places several stock apps in the Dock at the bottom of the screen. You can free up space for the apps you use most often by removing others you don't need in this shortcuts section.
To remove an application from the Dock, click the icon in the Dock and drag it to the desktop until the Remove option appears above the icon. Then just release the icon, and it will exit the Dock.

To add a new shortcut to the Dock, open it and right-click its icon in the Dock. Hover over the Option line in the menu and click Keep in Dock.
8. Move the Dock to the side
Your Macbook's Dock is at the bottom of the screen, but on a widescreen, you might want to place it on the side. And the good thing is that this is possible.
To move the Dock, go to System Preferences > Dock and choose Left or Right for Position on Screen.

You can also drag a slider to adjust the size of the Dock, or even set it not to appear when not in use. To do this, just check the Hide box and automatically show the Dock.
9. Activate dark mode
MacOS Mojave brought a dark mode to the operating system. To enable it go to System Preferences > General, and you will see Light and Dark options at the top of Appearance.
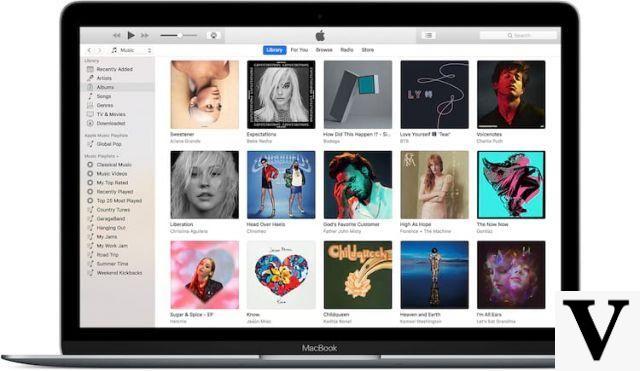
In most Apple apps, dark mode makes the background black and white. The Photos app and iTunes in particular look great in dark mode - the colors of photos and album art appear best with a black background.
10. Unlock MacBook Pro with Apple Watch.
One of the most interesting features for those who have an Apple smartwatch and a Macbook Pro is the possibility to unlock the notebook with the watch. Once it's set up, just turn on your Mac and if your Apple Watch is unlocked on your wrist, it will unlock itself. You can also use it to approve passwords and verify Apple Pay.
Go to System Preferences > Security & Privacy. On the General tab, check the "Use Apple Watch to unlock apps and Mac" box.
This will connect your Macbook to your Apple Watch to verify, and you will need to enter your Mac password. Once set up, you can quickly access your MacBook Pro.
Bonus: Update macOS
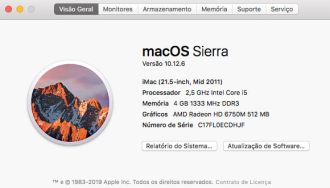
Has Apple released an update to macOS since the manufacture of its MacBook? Find this out by clicking the Apple button in the upper left corner of the screen, then About This Mac.
On the General tab of the About This Mac window, click the Software Update button, which will launch System Preferences to check for updates.