When your Mac is connected to a private network, whether at home or at the office, it is probably assigned the so-called address dynamic IP. And there's nothing wrong with that for most users. However, for some special situations, it is necessary to have an address static IP. On Mac, you can easily change the IP address through "System Preferences".
When setting a static IP address on macOS, you must create an IP address private IP permanent for your Mac that won't change overnight. Other devices connected to the local network will be able to access your Mac, and if you configure port forwarding, certain services running on your Mac will be accessible to the outside world.
You may also need to change your router settings to assign your Mac a static IP address and configure port forwarding.
you need to see- How to configure or change DNS on Windows and macOS?
- Understand the differences between dynamic IP and static IP
Why change the IP address?
Changing your external or public IP address from time to time can help you improve your overall security and browsing privacy. There are other reasons, too.
If you've just installed a new home router, you may need to reconfigure your network with a quick IP change. A common problem with home routers is that they sometimes give devices the wrong IP address, so changing your IP manually can resolve these glitches.
If you want to access a country's streaming media service catalog when you are out of that country for whatever reason, changing your IP to one based in the right country can give you the catalog you are looking for. Likewise, if you are a gamer looking to lower your lag, changing your IP through a gaming proxy server can help improve performance. A neat technical trick for second language learners is to use an IP address based in another country to generate search results and local publications written in the local language.
How to Change the IP Address on a Mac
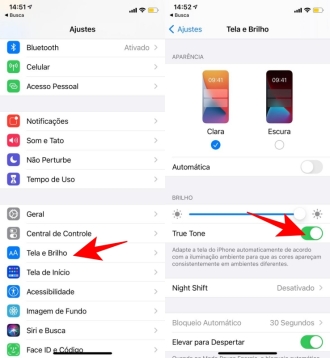
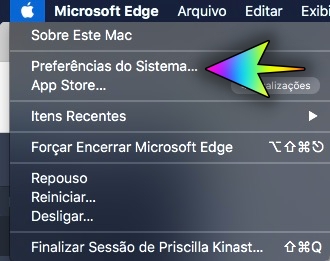
1. First, click on the Apple menu in the upper left corner of the screen. Then a drop-down menu will appear. Click the System Preferences button under "About This Mac".
2. Click the Network button, in the third row, the same row as "iCloud".

3. Click on the network you are using in the left sidebar. For example, if you are using a Wi-Fi network, click on "Wi-Fi".

5. Click Advanced in the upper right corner of the window.

6. Click on the TCP / IP tab at the top of the window, next to Wi-Fi and next to the DNS, WINS, 802.1X, Proxies and Hardware tabs.

7. Click the drop-down menu next to "Configure IPv4" and select "Manually".

8. Enter the desired IP address in the "IPv4 Address" field. You can take the beginning of your current address, and only change the end part of it. If you don't know which IP to use, check out our post below:
Attention: Note the IP address displayed in this window. Your new IP address needs to be identical, with only the third number changed. For example, you can change from 192.168.7.10 to 192.168.7.100.
9. Verify that your new local IP address is displayed and click To apply.
10. Finally, check if you can connect to the internet. If you chose a new IP that is already in use, you may have a conflict. In this case, restart the router to clear the conflict.
Alternative method
No step 7, instead of choosing the "Manually" option, choose the Using DHCP option and click Renew DHCP Lease. A new IP will be generated automatically. After that, just click OK.

How to Change Your IP Address on a Mac with a VPN
When you use a VPN, all your internet traffic is routed through the VPN's servers. Most VPNs provide worldwide server options for you to choose from, so you have an IP address from a different country.
The best VPNs also provide data security guarantees, making the transmission of confidential data more secure, and you can be sure that no one is intercepting your browsing. You can set up a VPN on your Mac using network settings or simply by downloading an app from the App Store.
What is VPN? Check out the 10 best paid and free services in 2020How to Set Up a VPN on Your Mac
1. Download a trusted VPN from the App Store and install it.
Note: While there are many free VPNs, the best ones require a subscription.
2. Start VPN, connect to a server and click Allow if prompted.
3. While the VPN is running, your public IP is the IP of the server you are connected to. If you want to return to your original IP, disconnect from the VPN server.