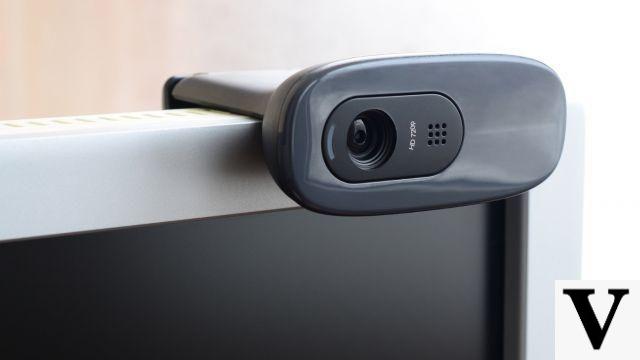
More and more, the webcam is an essential resource on your computer, even more so in times of a pandemic, when video conferences have become part of our daily lives. However, when your camera decides to stop working, it can be extremely frustrating. Here we bring you a list of 10 solutions for Windows 10, both for integrated webcam and a separate piece of hardware.
How to turn your smartphone into a wireless webcamBasic checks
- First of all, try turning the webcam off and on again. If your webcam connects to your computer via USB, removing it and plugging it back in is a quick way to try to fix it. By turning the webcam back on, you are resetting it. Resetting may also force your Windows 10 device to detect the camera.
- If the camera did not come back, try plugging it into a different USB port.
- Try restarting the computer, sometimes this works.
- Try unplugging the webcam and restarting the computer. Try the combination of the two previous solutions. Turn off the webcam, restart the computer, then plug the webcam back in.
- Finally, check the camera body. It is possible that the webcam is broken or in need of repair. If no signs of physical damage are visible, try connecting it to another compatible computer or notebook. You can also try connecting the webcam to an Xbox One.
How to make the webcam work again in Windows
1. Check for Windows updates
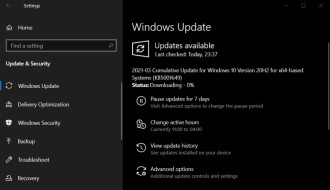
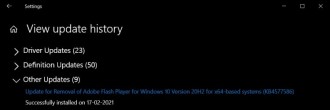
Updating Windows 10 may fix some webcam issues, as well as downloading the firmware and updating the driver. To update Windows 10, go to Login > settings > Update and Security > Windows Update and select Check for Updates.
2. Check the webcam software
It is possible that the webcam is in perfect condition, but the application is causing the problems. The easiest way to check this is to try using the camera in another Windows 10 app like Skype or Instagram. If the app is the problem, you may need to give it access to the camera in the app's settings.
To do this, open the menu start > configurações > privacy > camera. Choose your preferred setting for Allow apps to access your camera. In Choose which apps can access your camera, enable or disable individual settings for apps and services.
3. Check your Windows 10 privacy settings
For that, you need to give apps access to your webcam before they can detect and use it. open the menu Login > settings > Privacy > Bedroom and activate allow apps to access your camera.
In this general option, you can also enable or disable webcam access for each application you want. Then you will know which applications can and cannot activate your webcam.
4. Check the webcam software settings
Some webcams come with software that manages device settings. The application Lenovo Settings, for example, has a Privacy Mode setting that completely disables the webcam.
5. Check your Bluetooth connection if using a wireless webcam
Make sure Bluetooth is enabled in Windows 10 so that the device can detect it. You can do this by opening the Windows 10 Action Center and clicking on the option Bluetooth. To open Action Center in Windows 10, click the icon Notifications in the lower right corner of the taskbar.
6. Check if the camera is disabled in Windows 10 Device Manager
To enable it again, open the Device Manager and click the arrow to the left of the Cameras to display all your webcams. If there is a small arrow icon on the camera icon itself, it means it is disabled. You can enable it again by clicking on it and then choosing the option Enable. To open Device Manager, search for it in the search box on the Windows 10 taskbar.
7. Disable and enable the webcam in Device Manager
Doing this can sometimes trigger Windows 10 to notice a device. Find the camera on Device manager as in the previous step, right-click the camera name and click Disable. Then right click on it again and choose Enable. do not click Uninstall.
8. Update the webcam driver
Uninstalling the webcam driver from your notebook or computer, and doing the automatic reinstallation when restarting, may solve your problems.
open the "Device Manager" (Start > right-click Computer or My Computer > Manage > Device Manager). Click the small arrow on the left under "Cameras". Right click on your webcam (HP Webcam if you have an HP PC) and select "Properties";
On the Driver tab, click Uninstall;
Restart your computer when prompted. Upon restarting the system, the driver will be reinstalled and the webcam will work again.
9. Roll the driver back to a previous version
Occasionally, a new version of a driver adversely affects the device. To reverse it, locate your camera inside the Device Manager, right-click on it and click Properties > driver > Revert Driver > Yes. Restart Windows 10 after the process is complete.
10. Check for Windows 10 webcam compatibility
Some webcams are made for older versions of Windows and may not be compatible with Windows 10 desktop, tablet, or notebook computers. One way to verify this is to look at the packaging or manuals that came with the device.
Another option is to locate it within the Device Manager, right-click your name, and click Properties > driver > Driver Details and search the list files a file called stream.sys.
11. Errors 0xA00F4244 and 0x200F4244
When trying to turn on the camera, you may see an error code such as 0xA00F4244 ou 0x200F4244, along with the message "We couldn't find your camera". This information is not very helpful, so you can try some solutions, which we describe below.
Windows usually installs drivers automatically when it detects new hardware, but if you've recently upgraded to Windows 10, there's a good chance you'll need to manually update your hardware drivers.
Some Windows 10 store apps only support newer webcam models, so if your device is older, it might be completely incompatible. Most software, however, still supports old cameras.
It's also worth noting that Windows 10 has a feature that disables the built-in webcam. Keeping your webcam off when it's not in use is actually a great idea to protect your privacy, but it can cause problems when you need to use it.
12. Antivirus Settings
Antivirus software can occasionally interfere with webcams. Investigate your software settings to see if your antivirus is preventing your camera from starting, or temporarily disable your antivirus and try using your webcam. If you can with the antivirus turned off, then there's the key to the problem. See how to change antivirus settings with the software developer.
13. Connect the webcam to a different computer
If using an external camera (USB), connect it to another device to verify that it works. If it doesn't work either, then it's because the equipment is faulty, not your Windows.
14. System Restore
The idea is to get back to a restore point before your webcam starts to fail. This solution is effective especially when the cause of the failure is a software, driver or Windows update. Here's how to do it according to your Windows:
1. Right-click on the Windows Start menu and select Settings > Update & Security > Recovery > Reset PC and click "Start Now".
2. If this is your first time doing a restore, just press "Next". If this is not your first time, select "Choose another restore point" and click "Next".
3. Typically, you see a list of available restore points. If it appears, check the box in the lower left corner "Show more restore points" to see them all. Select the one you want by clicking on it and confirm with "Next".
NOTE: If you press the button below Detect Affected Programs, you will see a list of what will be uninstalled or changed after returning to the chosen point.
4. If everything is ok, click "Finish". Read the warning that appears and confirm with "Yes".
NOTE: To choose a different point, if it is not correct, press the "Back" button.
5. Do not turn off the PC until the process is complete. Your device may restart one or more times. A message will notify you when you are done and exit the Windows desktop.
Did nothing go right?
If your webcam still doesn't work with any applications, it may be faulty. If you are still under your laptop's warranty period (if it's built in) or your webcam's warranty period (if it's an external device), contact the manufacturer and see if they can resolve the issue.


