Currently, with the new version of the Windows 10 operating system, there are many options for applications such as Facebook, WhatsApp, among others. But some mobile apps are not yet available on the computer. However, if you want to use an Android app on your Windows 10 PC, here are 3 different ways to do it, without using emulators like Bluestacks. In case you want to use an emulator, I recommend reading my article with the 5 best Android emulators for Windows PC.
Although Microsoft is testing Android app mirroring on Windows 10, the system is still not running the physical app on your machine. However, there are several ways to do this without necessarily using emulators.
To help keep things simple, we've compiled a comprehensive guide on what software and utilities you need to install Android apps on virtually any Windows computer.
Dual Boot
There is an alternative to Android emulators that offers newer versions of Android, but the setup is a little more complex. Called "Dual Boot", this feature effectively turns your Windows computer into an Android device. You will have the option to boot into Android when you turn on your computer, and Android will work just like it does on your smartphone or tablet.
However, it is not as simple as installing native Android. Since computer hardware like Intel processors, graphics cards and physical hard drives need to be added by a third party developer on Android, you will need to find a custom distribution that supports your machine.
Phoenix OS
Like the now-defunct Remix OS, Phoenix OS is a full-featured Android 7.1 or 5.1 operating system that runs on your Windows machine. This offers the functionality of a desktop operating system, plus full compatibility with Android apps. Here's how to prepare to use it.
Step 1: Go to the Phoenix OS download page and download the latest installer for your PC. Choose the .exe or .ISO file for the Android version you prefer.
Step 2: Create a new partition for the Phoenix OS installation. Don't know how to do this? See how to partition hard drive without formatting the PC and without programs.
Step 3: Run the Phoenix OS installer and install it on the new partition. Alternatively, create a bootable USB drive and install it at boot. Check out 6 programs to create bootable flash drives.
Step 4: Choose a volume letter and the size of the volume you want to create.
Step 5: Wait for the installation process to complete. Then reboot and choose Phoenix OS from the boot menu. The latest versions of Phoenix OS come preloaded with the Google Play Store, so download your apps from there and go!
Android-X86
Android-x86 is an open source project that seeks to support the latest version of Android on Windows hardware.
The latest version of Android-x86 adds support for Google notification features, smarter background application management, smart text selection and OpenGL ES 3.x hardware acceleration for Intel, AMD and Nvidia graphics.
While customizations to the Android OS are minimal, the Android-x86 team has added some significant tweaks to give Android a desktop-like interface. This release comes with features like a new taskbar launcher, and apps can also be launched in resizable windows instead of just full screen.
Android-x86 also allows you to customize Android to your liking. You can install third-party themes, splash screens and more without having to worry about whether they work well together - unlike Remix OS.
See this list for supported devices.
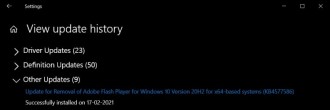
Step 1: First, make sure your computer's hard drive has at least 2GB of free space. To do this, go to Settings > System > Storage and check the free space (on the right);
If space is OK, download the latest Android-x86 ISO.
Step 2: Download UNetbootin. Open UNetbootin and select the Android-x86 ISO file you downloaded earlier. Select the USB drive from the list of options and click OK.
Step 3: Restart your computer and select Boot on the Boot Device Selection screen. Then select your flash drive. From the UNetbootin menu, select Install Android-x86 to hard drive.
Step 4: Select the partition or location where you want to install Android-x86. The program will ask if you want to format the disk; if you're not sure, don't format.
Step 5: You will be asked if you want to install GRUB. Select Yes and Yes again. You will now be asked if you want to "make system r/w", which allows Android-x86 to read and write data to your hard drive. Select Yes.
Step 6: Restart the computer a second time. Once installed, use the Google Play store to install Android apps as you wish.
How to Run Android Apps on Windows 10 Using Google Chrome and ARC Welder Plugin
This method runs Android apps using a plugin in Google's Chrome browser. Apps open directly in a new window, as if they were native Windows 10 apps.
Step 1: The Chrome plugin you need is called ARC Welder. Just follow the link on the Google page which will take you to the download page.
Step 2: Then click Add to Chrome and confirm. This will download and install ARC Welder.
Step 3: Once you're done installing the app from the Chrome App Launcher, you can also search for it directly in the Windows search bar. When you have your APK files available, just install.
Step 4: To run Android apps, just launch ARC Welder and choose Add your APK to select your file.
Step 5: ARC Welder detects the application and offers some simple options like orientation, form factor and clipboard access.
Step 6: Click Launch Application and it will instantly launch in a new window.
Limitations: As ARC Welder does not provide a complete Android system, some applications do not work, especially those with special hardware requirements. Also, you cannot save data and files when switching between apps.