A Samsung finally released the Android Oreo for your Galaxy Note 8 com Exynos. The update arrived after a long wait with the March security patch. So if you have a Galaxy Note 8 with Exynos and wants to guarantee the Android Oreo on the device, follow our tutorial.
With Oreo come the expected improvements for the device. These include picture-in-picture mode, notification channels, background app improvements, snooze notifications, and more. In addition, Samsung also guarantees specific improvements with Samsung Experience 9.0.
However, following the tutorial below will ensure that your device receives the latest update. Android Oreo. It has already started to be distributed and is reaching the Galaxy Note 8 com Exynos slowly. However, it is important to remember that the tutorial will work in almost all Galaxy Note 8 models with Exynos. However, they must have the model number N950F. The only exception is Korean handsets.
Precautions before starting the procedure
Before starting the procedure, it is extremely advisable that save your files in backup. That way, if something unexpected happens, you won't lose everything. Also, another important tip before starting this tutorial is to try to upgrade in the standard way.
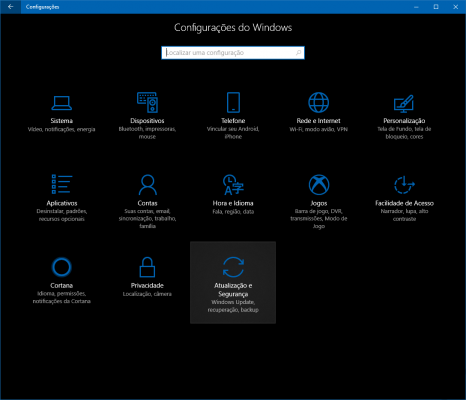
If it is already available for installation on your device, it will not be necessary to perform the procedure. To do this, go to Settings > Updates > Check for updates. For all other cases, follow the procedure step by step below.
Installing Android Oreo on Galaxy Note 8 with Exynos
If the standard update is not available on your device, follow the steps below:
1 – First, download the firmware file for the Note 8 from the SamMobile website. Attention: you need to register on the site to download. To do this, simply click on “Join to Download”, select the first option of 0€ and register.
2 – Extract the file Odin firmware, which will be in ZIP format, on your computer.
3 – Download the Odin Tool (Odin Tool), official from Samsung.
4 – Open the Odin v3.13.1 file.
5 – On the program screen, 5 file options will appear to select, but we will only select 4: BL, AP, CP and CSC. USERDATA will be blank.
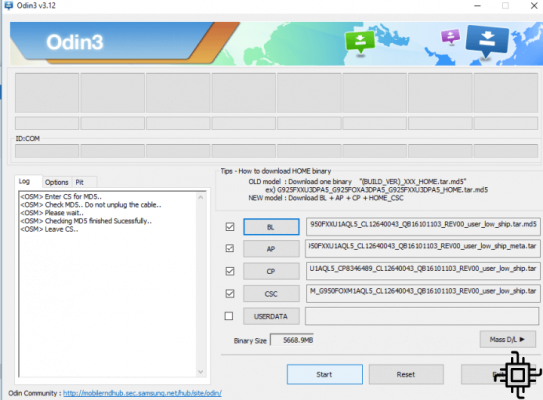
6 – Click on BL and select the file in the window that starts with the letters BL with a double click. Do the same with the AP and CP. In CSC, select the file that starts with HOME_CSC. If you choose the file that starts with CSC direct, it will erase your data and restore.
7 – ATTENTION: Next to LOG in the left window, there is the OPTIONS tab. Go to it and make sure the RE-PARTITION option not is selected. Checking this, go back to the LOG tab.
8 – Restart your Galaxy Note 8 in download mode. To do this, just turn off the device and then turn it on again by simultaneously holding the Bixby button + the volume down button + the on/off button.
9 – Connect the device to the computer using the cable. Then press the volume up button to continue.
10 – When in Odin the blue sign appears in the bar above the LOG tab, click Start.

Ready, now just wait until you download the files and restart the device. Keep in mind that this may take a few minutes.