Table of Contents
- Requirements for the Android Pie 9 beta
- First step:
- Second step:
- Third step:
- Fourth step:
- Fifth step:
- Sixth Step:
- Seventh Step:
- Eighth Step:
- Step XNUMX:
Where is Android Pie 9? It is not news for the Samsung consumer that, when a novelty regarding Android is released, it takes a little while to arrive on the Korean company's devices. That's why, once in a while, the internet finds a way and a beta version appears to meet the need of the impatient.
If the update in question is one of the most important releases of the year, the step-by-step that we will teach you below is essential.
First of all keep in mind that, as it is a beta version, this version of Android Pie 9 is far from being a complete product, and may have bugs and some other problems until the release of the original version. But it's still a good alternative until then.
Requirements for the Android Pie 9 beta
Before we start, it is very important to note that the beta version must be installed to your mobile via an external source. Here's what you need to have beforehand before the process:
- An unlocked Galaxy S9 (G960U or G960U1) or S9+ (G965U or G965U1) phone.
- The ADB and Fastboot programs are already installed.
- A Windows computer with the requirements for a Samsung mobile phone previously installed.
- And finally, a USB cable. Of the company's brand, preferably.
First step:
It is necessary to perform the download with the program called Odin. Download the file according to your model, being different files for Galaxy S9 and Galaxy S9+, and save the file to your hard drive. It is worth remembering that the file is quite heavy and its download may take a few minutes.
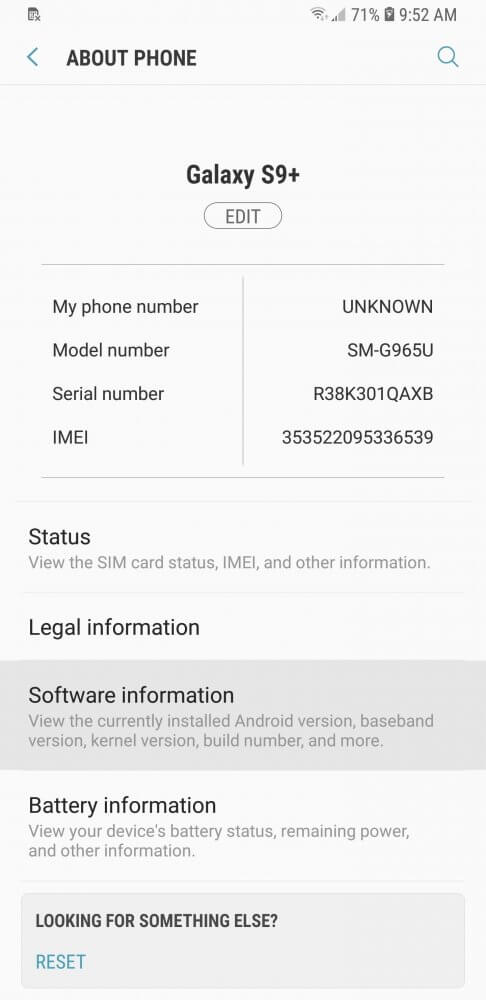


Second step:
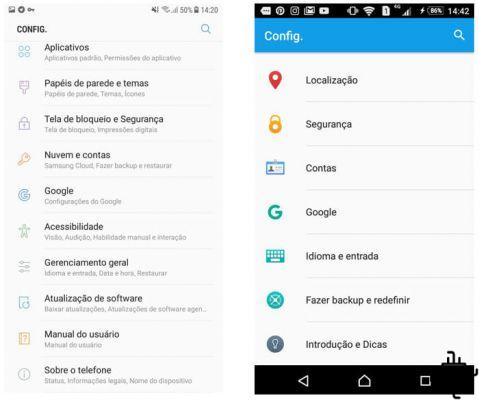
To proceed with installing the beta version of Android Pie 9, you must have the latest version available for the Galaxy. It's simple to check if the version is up to date. Just enter the Settings section and click on “About Phone”. In this tab, just select “Software Information”.
ATTENTION: If the available version is listed as “Ari16”, skip to the seventh step. Otherwise, follow the next steps.
Third step:
If your Galaxy still doesn't have the Ari16 version, just install the latest Android Oreo using a program called Odin and a firmware corresponding to your phone model. From there, just extract the programs on your computer and follow the next steps.
- Download Odin
- Download ARI6 Oreo for Galaxy S9
- Download AR16 Oreo for Galaxy S9+
Fourth step:
Once you have access to Odin and the latest version of Oreo for your S9 or S9+, go back to your device and boot it into Download mode. To do this, first turn off your phone, then press and hold the Bixby and Volume Down buttons, then press and hold the power button. Release the three buttons once it boots into download mode, then press volume down again to enter Download mode.

With the device in download mode, connect it to the computer using a USB data cable and proceed to the next step.
Fifth step:
Once the connection between your Galaxy and your PC is established, right-click on Odin and choose “Run as administrator” and enter your Windows login credentials if prompted.
You will see “Added” inside the program’s “Log” box, along with a light blue bar at the top left, verifying that Odin is connected to your device. If you don't see them, close Odin and disconnect your device, re-enter Download mode and reconnect to your PC.

Once Odin and your device are connected, you will still need to ensure that the program is configured correctly to avoid a potential disaster. To do this, click on the “Options” tab in the box located on the lower left side of the program. From there, make sure the little box next to “Re-Partition” is not checked.

Sixth Step:
With Odin properly configured, you are ready to update your device to the latest version of Oreo before an Android Pie Beta update. To get started, click the “BL”, “AP”, “CP” and “CPC” boxes one by one and select the files that have the corresponding letters at the beginning of their filenames. Leave the “USERDATA” field blank.
It is worth noting that when you load the file starting at “AP”, Odin may be unresponsive for a few seconds to a minute. This is due to the size of the file, so sit back and wait for the process to complete. As for the CSC file, you may have noticed that the firmware files you downloaded come with a regular CSC file and another file that starts with HOME_CSC.
According to XDA, choosing the old file will wipe the device, while selecting the latter will keep all your data intact. In our research, however, we found that using the regular CSC file kept all the data intact. Of course, results can still vary from device to device, so use your best judgment when selecting a CSC file.

Now you are ready to flash your S9 or S9+, so press “Start” at the bottom of the program to run the process. Please note that you will need to start the process again from Step 4 if you get stuck on “configuration connection” or if Odin crashes. If this problem persists, we recommend that you connect a different USB port to your PC, using a different cable or a combination of both to correct the problem.
Either way, the “flashing” process will take a few minutes to complete, so relax and wait until Odin finishes his work. Once his device is successfully updated to the latest version of Oreo, Odin will display a “Sign Out!” in the upper left corner of the program screen.

Seventh Step:
Now that your S9+ or S9 has been updated to Oreo 8.1, the way is now simple for you to update to Android Pie 9. To do this, first boot into recovery mode by turning off your device. Once disabled, press and hold the Bixby and volume up buttons, followed by pressing and holding the power button. Release the power button once the phone boots up, then release the remaining buttons when you see a blue screen.

Blue screen with Android logo will automatically transition to recovery screen after phone fails to detect updates or commands. After entering recovery mode, go to the next step.
Eighth Step:
Now you will need to run an ADB command to sideload the Android Pie update on your S9 or S9+. This means that you will need to open a Command Prompt in the platform-tools folder inside the ADB installation directory. In addition, you will also need to select “apply adb update” on your device's recovery screen, using the same button combinations mentioned in the previous step.
If you did a standard install of SDK Tools from Google, go to the C:Program Files (x86) folder Android android-sdk platform-tools. Otherwise, go to the folder where you installed ADB and open the platform-tools folder inside the page.
Once inside the folder, press and hold the Shift button on your keyboard, right-click inside the window and choose “Open command window here”, or type “cmd” into the folder's address bar. Alternatively, if you have enabled ADB to run in any folder on your computer, you can open a command window directly from the update file folder.

Now, type the following command in terminal and press enter right after. Proceed to the next step you took.
adb start-server
Step XNUMX:
With ADB up and running, enter “adb sideload” followed by a space and then the location of the update ZIP file. For example, if the update file is found in the Downloads folder on your PC and the file name is piebeta.zip, you will need to enter the command as follows:
adb sideload C: UsersjuanmDownloadspiebeta.zip
If you opened a command prompt from the update file folder, you only need to type the command, along with the name of the .zip file.
adb sideload piebeta.zip
Make sure you have the command properly typed and then press enter to run it. Once done, your S9 or S9+ will update to Android Pie Beta via ADB, which will take a few minutes due to the file size. During installation, however, your status will be displayed as a percentage in the command prompt to allow you to track your progress. Your device will automatically reboot once the update is complete.

It worked out? Was there any doubt? Leave a comment.