This guide will show you how to run older programs for Windows using Windows 10 compatibility mode. It can help you run your favorite programs designed for an older operating system on the latest version of Windows.
The steps detailed here are official Microsoft troubleshooting and we will detail each compatibility setting. This should cover several tricks to get old programs running on Windows 10 successfully. With this in mind, different programs may ask for different solutions.
Run Compatibility Mode Troubleshooter on Windows 10
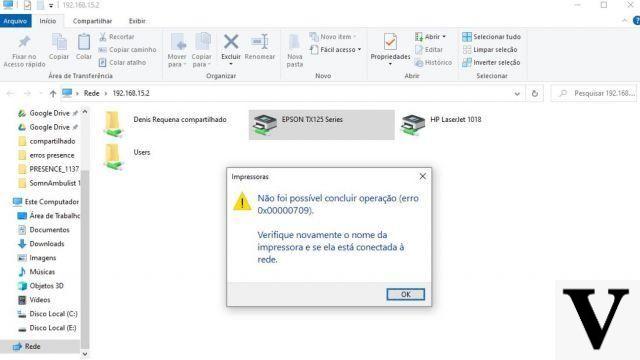
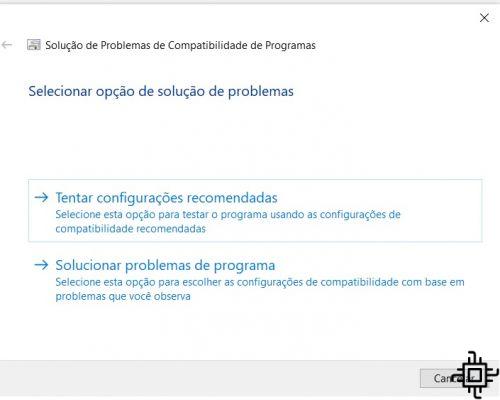
Go to the start menu, type "run programs" and click on the control panel option "run programs made for earlier versions of Windows". You will open this window:
It will now launch the "Program Compatibility Troubleshooter" wizard. Click "Next" to proceed.
Wait a few seconds for the Troubleshooter to detect any possible issues before creating a list of available programs in Windows 10.
You will then see a list of all programs available on your Windows 10 system. Scroll down and select the program that is causing you problems. If your older program is not visible, select "Unlisted".
You can directly import the older program's .exe file for complete analysis and resolution. Click "Next" to do this.
Now we will enter the possible solutions for the chosen program:
Compatibility Mode: Try recommended settings
The Program Compatibility Troubleshooter offers two different options to resolve any compatibility issues. Let's examine each one. Use "Test Recommended Settings", which will allow the troubleshooter to automatically apply Windows 10 compatibility based on built-in presets.
The selected program is ready to be patched for compatibility issues. Test the program for problems. Click next to continue.
The Program Compatibility Troubleshooter will quickly detect and resolve any issues and investigate whether the issue has been fixed. If so, "save the settings" of the program and exit the wizard. You should not face any more issues after this step.
If there are still problems, you can "try again using different settings" and this will take you back to the second option as shown in the next section.
Compatibility mode: troubleshoot programs
As a second option in the Program Compatibility Troubleshooter, select "Troubleshoot Programs", which allows greater manual control over the exact nature of the problem.
You will be given a selection of older operating systems that the program may have been designed for. Select "Don't know" if you don't remember very well. After selecting, the program will automatically establish compatibility with the previous version.
There are more advanced compatibility tricks shown below. For most applications designed for Windows 7 and Windows 8, you may not need to go very far, but programs for Windows XP and earlier are more difficult.
Use reduced color mode
Today's PC graphics are much more advanced than previous versions. It is possible that some of your older programs were designed to run using a limited set of colors in the palette. This is what leads to blank screens.
You can reset your older Windows program to operate in "8-bit color (256)" or "16-bit color (65536)". To do this, right-click the program's .exe file anywhere on your PC and go to "Properties -> Compatibility". Use the "reduced color mode" option to fix the problems. Apply the changes to save and run the old program again. If it still doesn't work correctly, go to the next compatibility setting.
Run at 640×480 resolution
Sometimes display issues in an older program are due to graphics issues that may be choppy or rendered incorrectly. Right-click the program's .exe file again and select "Properties -> Compatibility". You can select the screen resolution "640 × 480".
Change high DPI settings
There is another compatibility setting called "Change High DPI Settings" which will resolve any conflicts due to programs looking blurry, too big or too small in Windows 10.
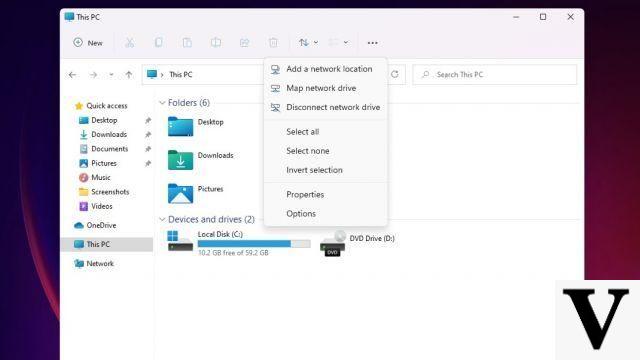
To do this, go back to the "Properties -> Compatibility" option and click on "Change high DPI settings". This will open a new dialog box. Select "fix scaling issues" or "override high DPI scaling behavior". Both will help you make programs look less blurry.
There are two more compatibility settings with the official manual recommended by Microsoft. Some programs require administrator permissions to run properly, so you need to right-click and run the program as administrator. You can also go back to "Properties -> Compatibility" and change the settings for all users.
As we've seen in this guide, most older apps or games run poorly on Windows 10 because they were specifically designed for Windows 8, Windows 7, Windows Vista, or Windows XP. But with the Windows Compatibility Troubleshooter, there is always a way to run your legacy apps on a newer computer. In case you still encounter difficulties, it is recommended to look for specific solutions for the faulty program, some games and programs need solutions that go beyond compatibility mode.